
LETTERS of ARA
An online journal & newsletter, exploring areas of influence & interest for Ara the altar.

Looking for the Blood Moon
Unwritten tales from both sides of the Lunar Eclipse.
A shoot by Laima Arlauskaitė

LOOKING FOR THE BLOOD MOON
UNWRITTEN TALES FROM BOTH SIDES
OF
THE LUNAR ECLIPSE

A SHOOT
Capturing work by Marta of Lemuel MC
Worn by Marco and Marta.
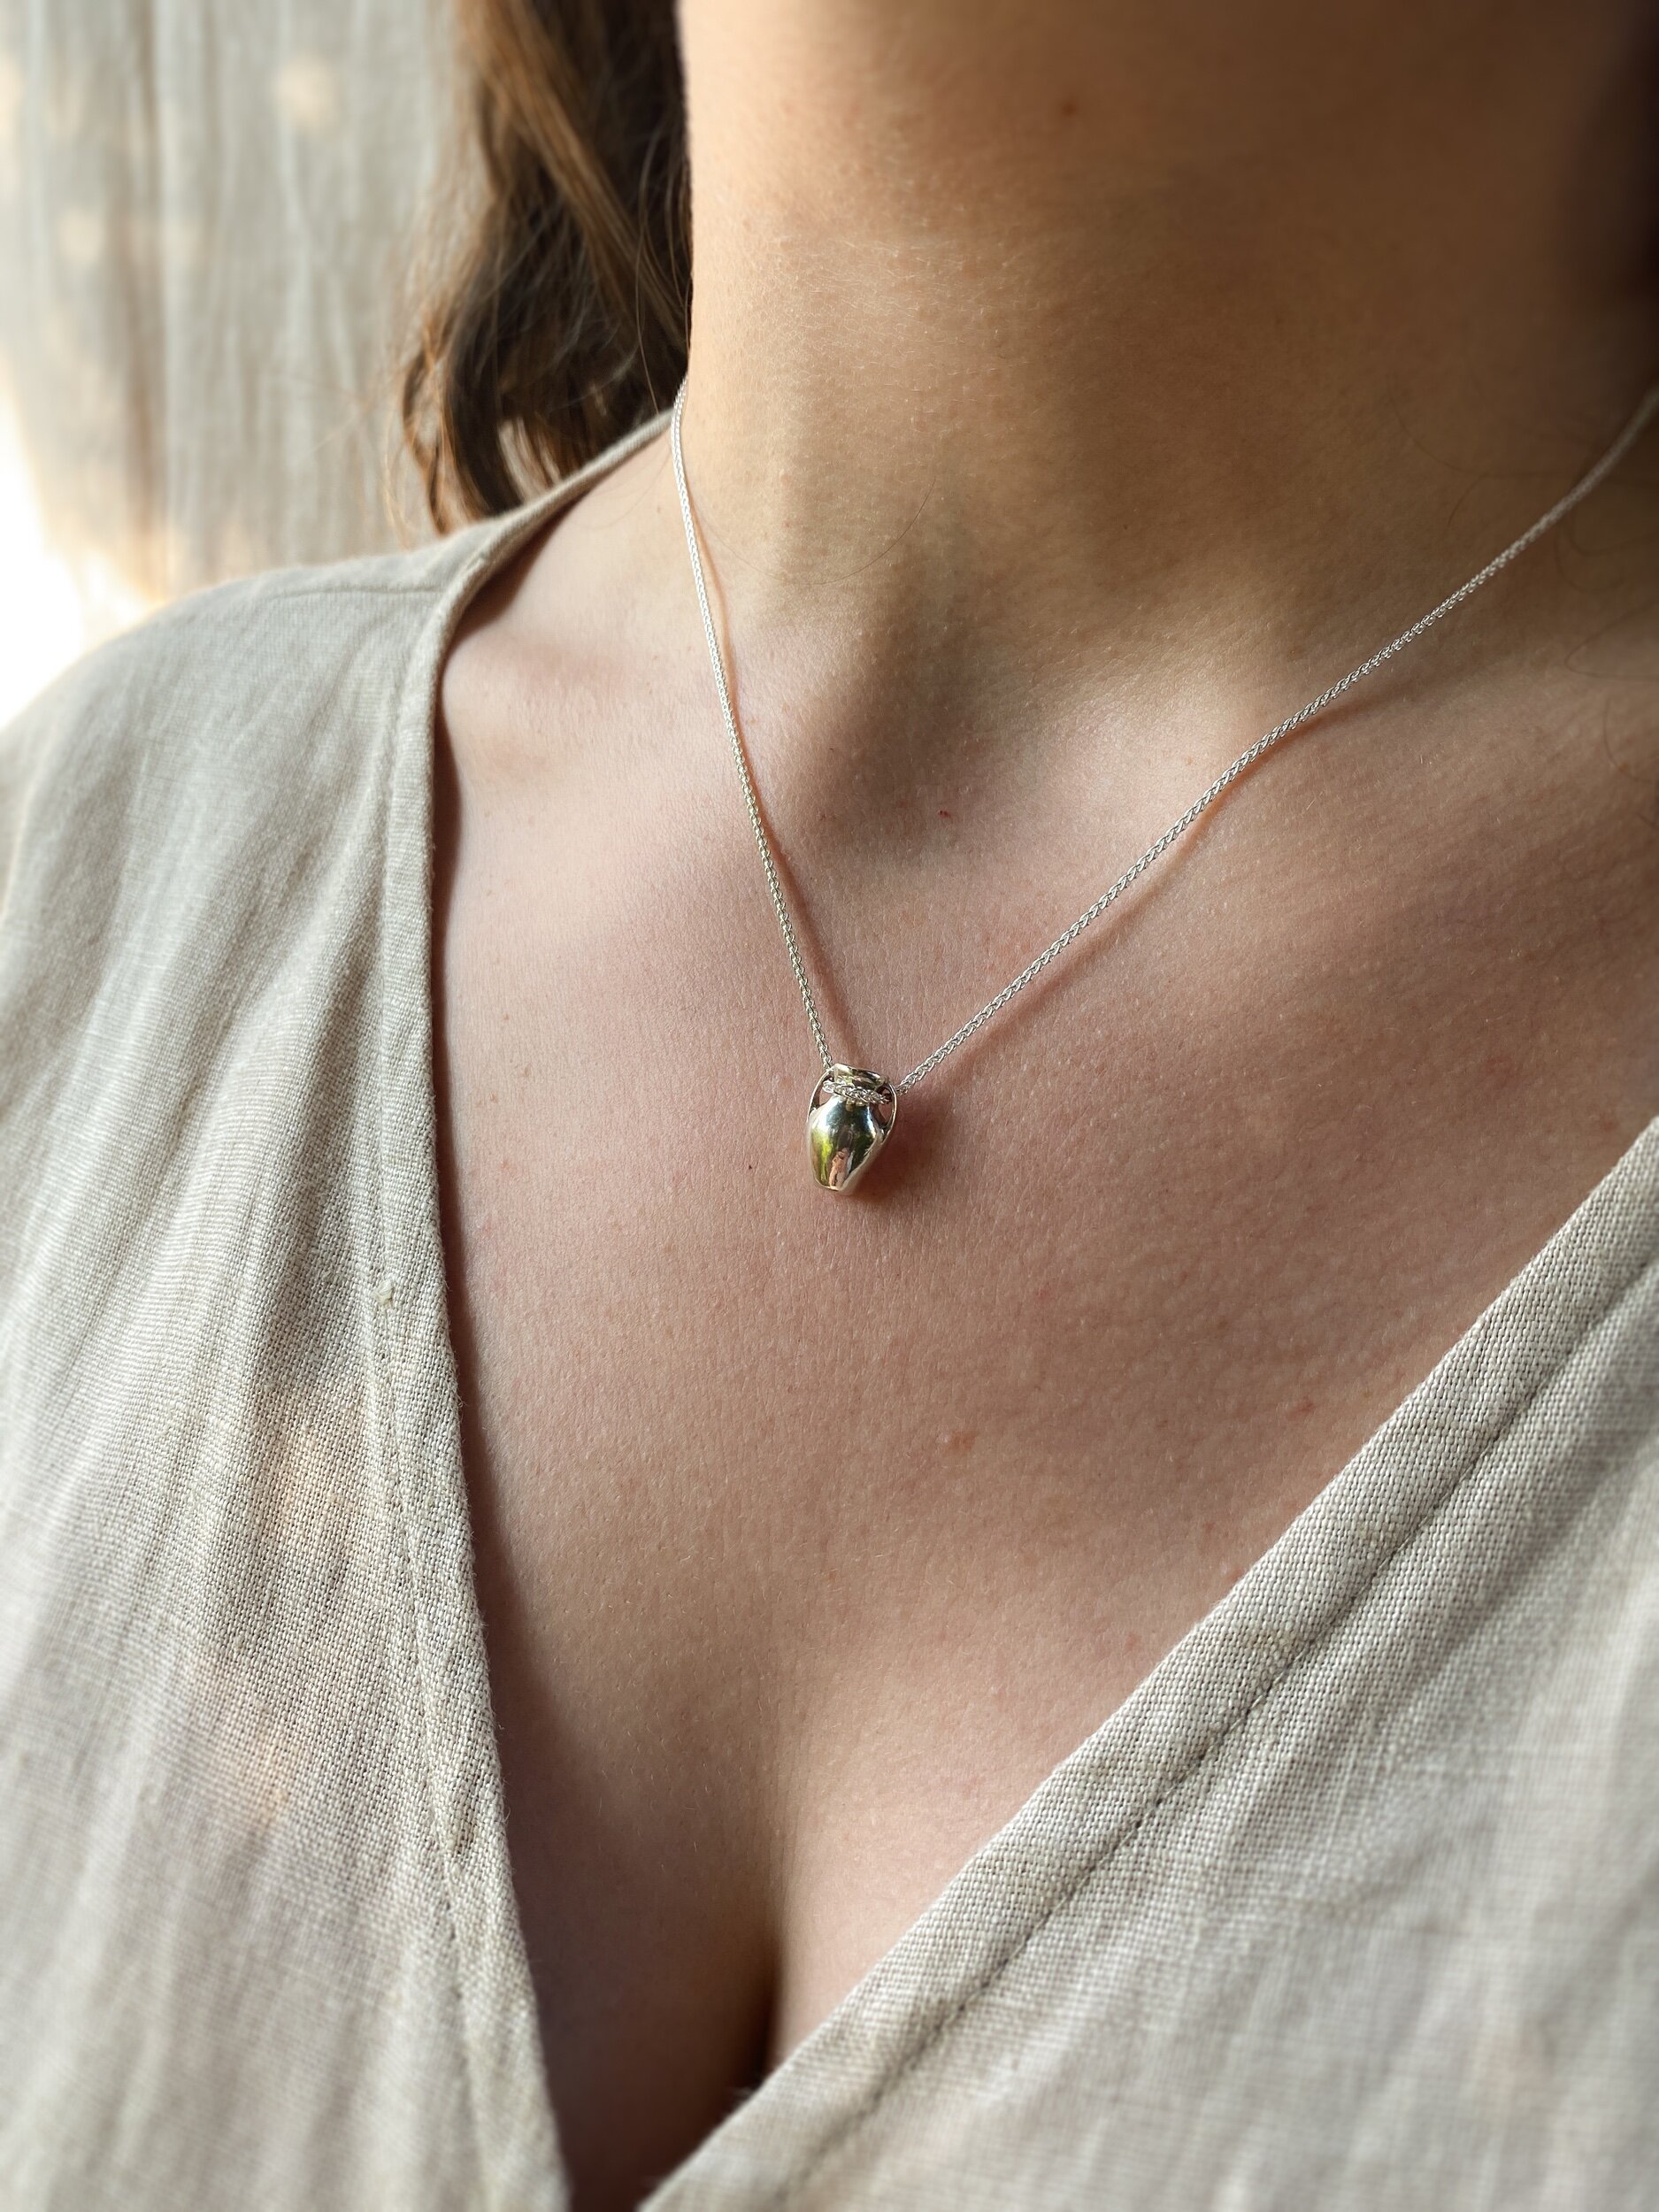
ft. Ara’s recycled solid gold Venetian Sea Ring

“Legend has it the moon has 20 spouses and a lot of pets, most of these pets were mountain lions and snakes, and when the moon didn’t bring them enough to eat, they attacked and made him bleed. The eclipse would end when the moon’s wives & husbands would come in to protect him, collecting his blood and healing him to health. On the rare apparition of the full lunar eclipse, we found ourselves wandering. Here’s our journey. Pt. III.”

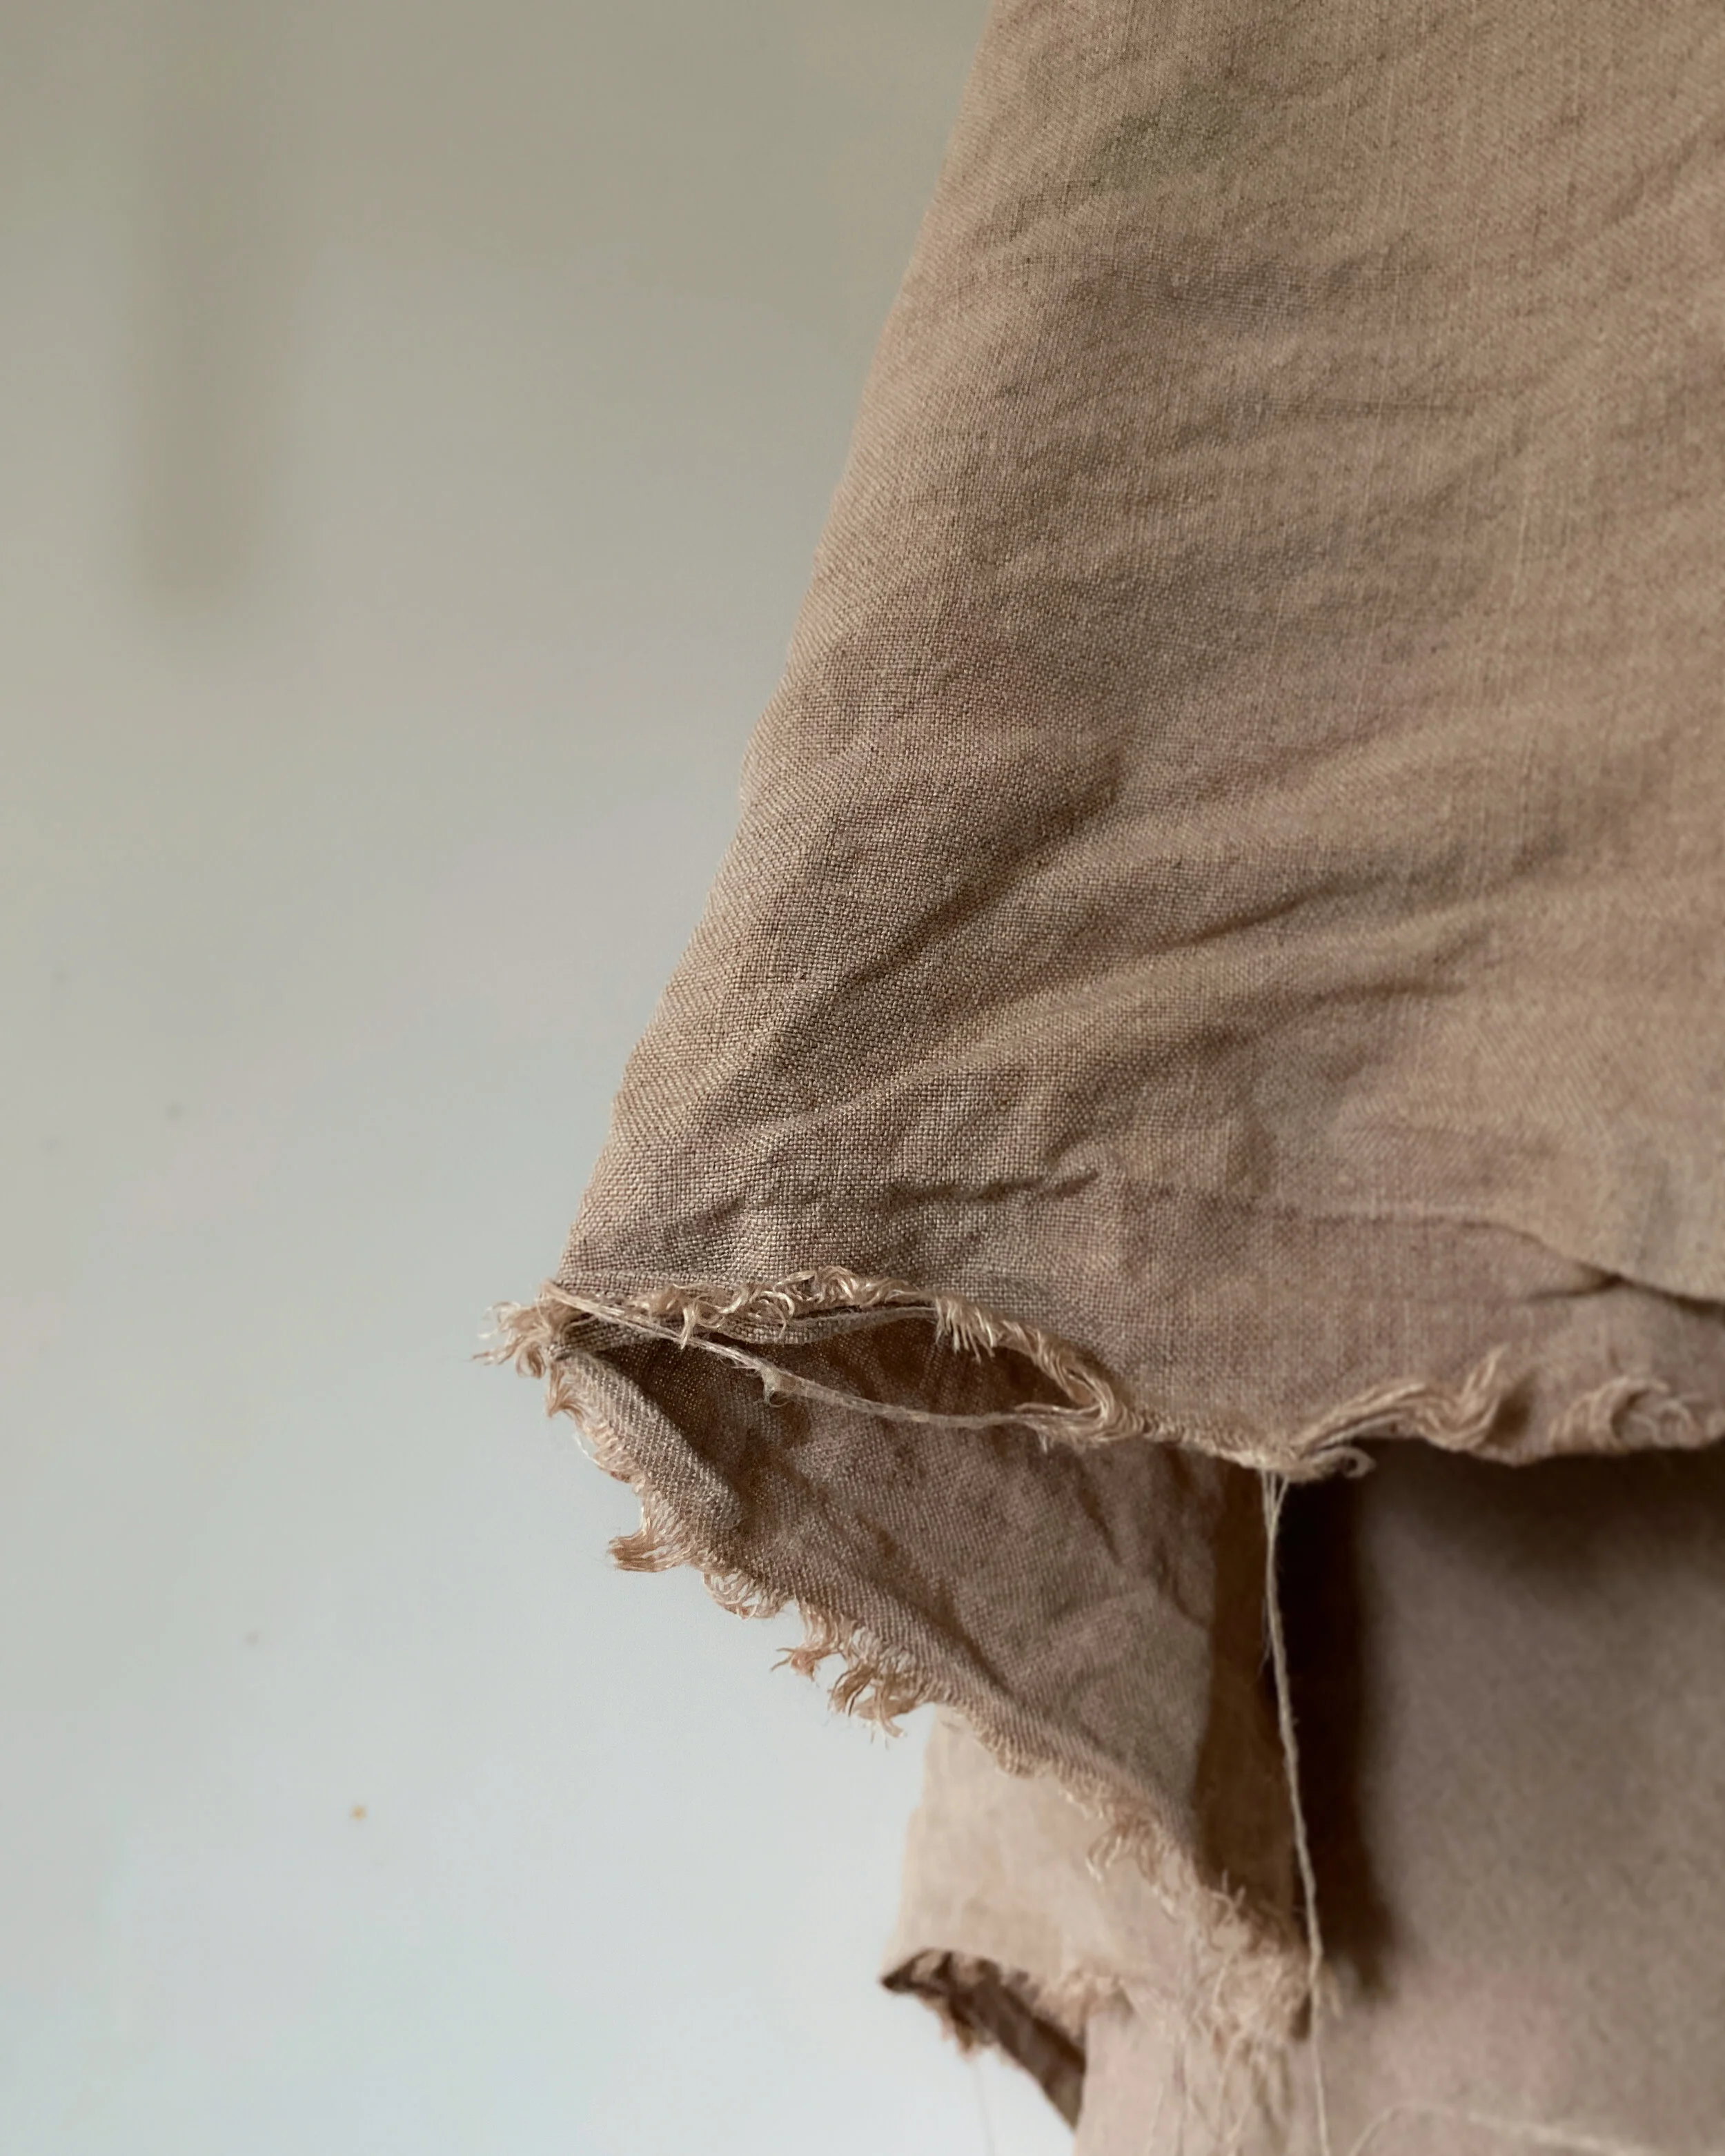
“After a period of self doubt, overthinking and creative block came stepping back and letting go. This release brought ...-Lite. These new designs are inspired and boldly mixed between Tudor and Pre-Raphaelite Styles I wanted airy dresses so the wind could flow freely through the vast amount of fabric, letting the wearer feel free from their burdens as if the wind takes them away forever.”

L A Y E R I N G
T H E V E N E T I A N S E A R I N G —
A simple recycled gold ring with an organic form and raw finish.
Drawing inspiration from the ‘Venetian Sea’ — one of the twelve Lunar Maria or 'Seas of the moon'.
Marta wears two recycled solid gold Venetian Sea Rings, layered on one hand.
One at the base of her finger.
The second inbetween her knuckles as a midi ring.
The organic fluidity of this piece works perfectly when layered.

Explore the full story of healing the moon on Laima’s website.
And shop The Venetian Sea Ring here.
L x

Behind the altar | Vol. 5 Sand Casting
A documented journey of my first sand casting project

WHAT IS SAND CASTING?
Sand casting is an ancient technique used to cast molten metal into a desired form.
A special kind of compressed sand is used to create a mould containing a cavity into which molten metal is poured.

SAND CASTING
A RESPONSIBLE APPROACH
Unlike lost wax casting, the majority of the material (sand) used to create the mould can be used time and time again, making it a renewable and much more sustainable process, producing minimal waste.
Introducing sand casting into the Ara workshop enables me to cast certain pieces in house. This means less transport of waxes and castings to and from the casting house, minimising CO2 output.
Taking it one step further, rather than using a powerful gas torch to melt the metal for this process, I have invested in an electric furnace. The metal can be melted using the workshop’s electricity, powered by 100% renewable energy. After doing a lot if research I chose a furnace made here in the UK, again, lessening CO2 output.
A ONE-OFF PROCESS
Unlike the silicone or rubber moulds used in combination with lost-wax casting —from which wax forms can be produced over and over again— sandcasting requires a new mould to be made for every cast.
Sand casting therefore lends itself to the creation of more organic, unique works.
SURFACE TEXTURE
Depending on how compressed the sand is during the pour of the molten metal, the work can adopt a sand-like, less refined surface texture, which adds to the organic nature of this process.

The completed project — the cast recycled silver pebble pendant alongside the original
THE PROJECT
“Lauren was so enthusiastic, accommodating and thoughtful throughout the entire process, and I felt very included in the decision making right from the very start.
The pendant turned out even better than I could have ever imagined!
And I would recommend Lauren, and the magic she creates in her studio, every day of the week.”
A CAST RECYCLED SILVER PEBBLE PENDANT
A very dear client approached me to explore potential projects to create a gift for her beloved mum’s 60th birthday.
We decided on the perfect project — a pebble found on her mum’s favourite beach, one that spoke to my client and that would suit the recipient's style.
This nature of this piece meant that it was such a special project for my first attempt at sand casting.
Below I outline the process I took in the creation of this project, and the learning along the way.

Refining the sand with a wood handled taping knife
THE PROCESS
I. PREPPING THE SAND
A successful cast hinges largely on the successful construction of the mould.
This is a slow process that requires a lot of care and attention to detail.
The first step is to refine the texture of the sand and remove any lumps or bumps so when it’s compressed into the mould, it can be packed down as densely as possible.
I used a taping knife to repeatedly chop up the sand. A metal ruler can be used for this but I found the wooden handle of the taping knife a more ergonomic tool for my hyper-mobile joints.


II. FILLING THE MOULD
Once I was happy the sand was a finer texture, I began to pack it tightly into one half of the mould.
I alternated adding some sand with hammering it down with a weighty hammer to make it more compact and dense.
Once the mould was full, I used the taping knife to scrape the excess sand off the top and flip it over, revealing a smooth and compact surface.
As you will see in the second image, my first attempt wasn’t as compact as it could be so I removed the sand and redid the process with a little more elbow grease so I was happy the sand was nice and snug (see below images).


III. POSITIONING THE OBJECT
I pressed the pebble into the sand so it sat about half way in, pressing down evenly from either side of a ruler.
Once the pebble was in position, using a dry paintbrush I carefully brushed a little talc over the sand to stop it from sticking to the sand that would fill the other half of the mould.
I precisely connected the other half of the mould, being careful to make sure the line engraved on both sides met neatly as this is crucial to ensuring the shape of the final cast is not distorted.
I then packed the empty top half of the mould with more sand, this time being careful not to dislodge the pebble with the pressure of the hammering.
After scraping off the excess sand from the top of the mould, I carefully pulled apart the two ends and removed the pebble to reveal a cavity within either side of the mould.

A first successful cast
IV. CARVING FOR THE SPRUE AND AIRVENTS
This is the most complex part of the process, first carving a well for the molten metal to pour into the widest part of the pebble shape. It’s really important at this point to make the hole wide enough so that the metal will flow as quickly as possible into the mould before it starts to cool — whilst also avoiding impacting on the shape of the cavity.
Secondly, the air that is trapped inside the cavity needs to go somewhere when the molten metal is poured in, otherwise air bubbles will be formed and the cast will not be successful.
For this, I pushed 6 holes around the edge of the mould to create 6 air vents. I then carved a tiny channel from the pebble cavity to each of the holes to provide a release for any trapped air. Here I had to be careful to brush out any sand that fell into the vents to maintain a clear airway.
Once I was happy with all of the carving within the mould and that the pebble shape remained in tact, I rejoined the two parts of the mould, ready for casting.
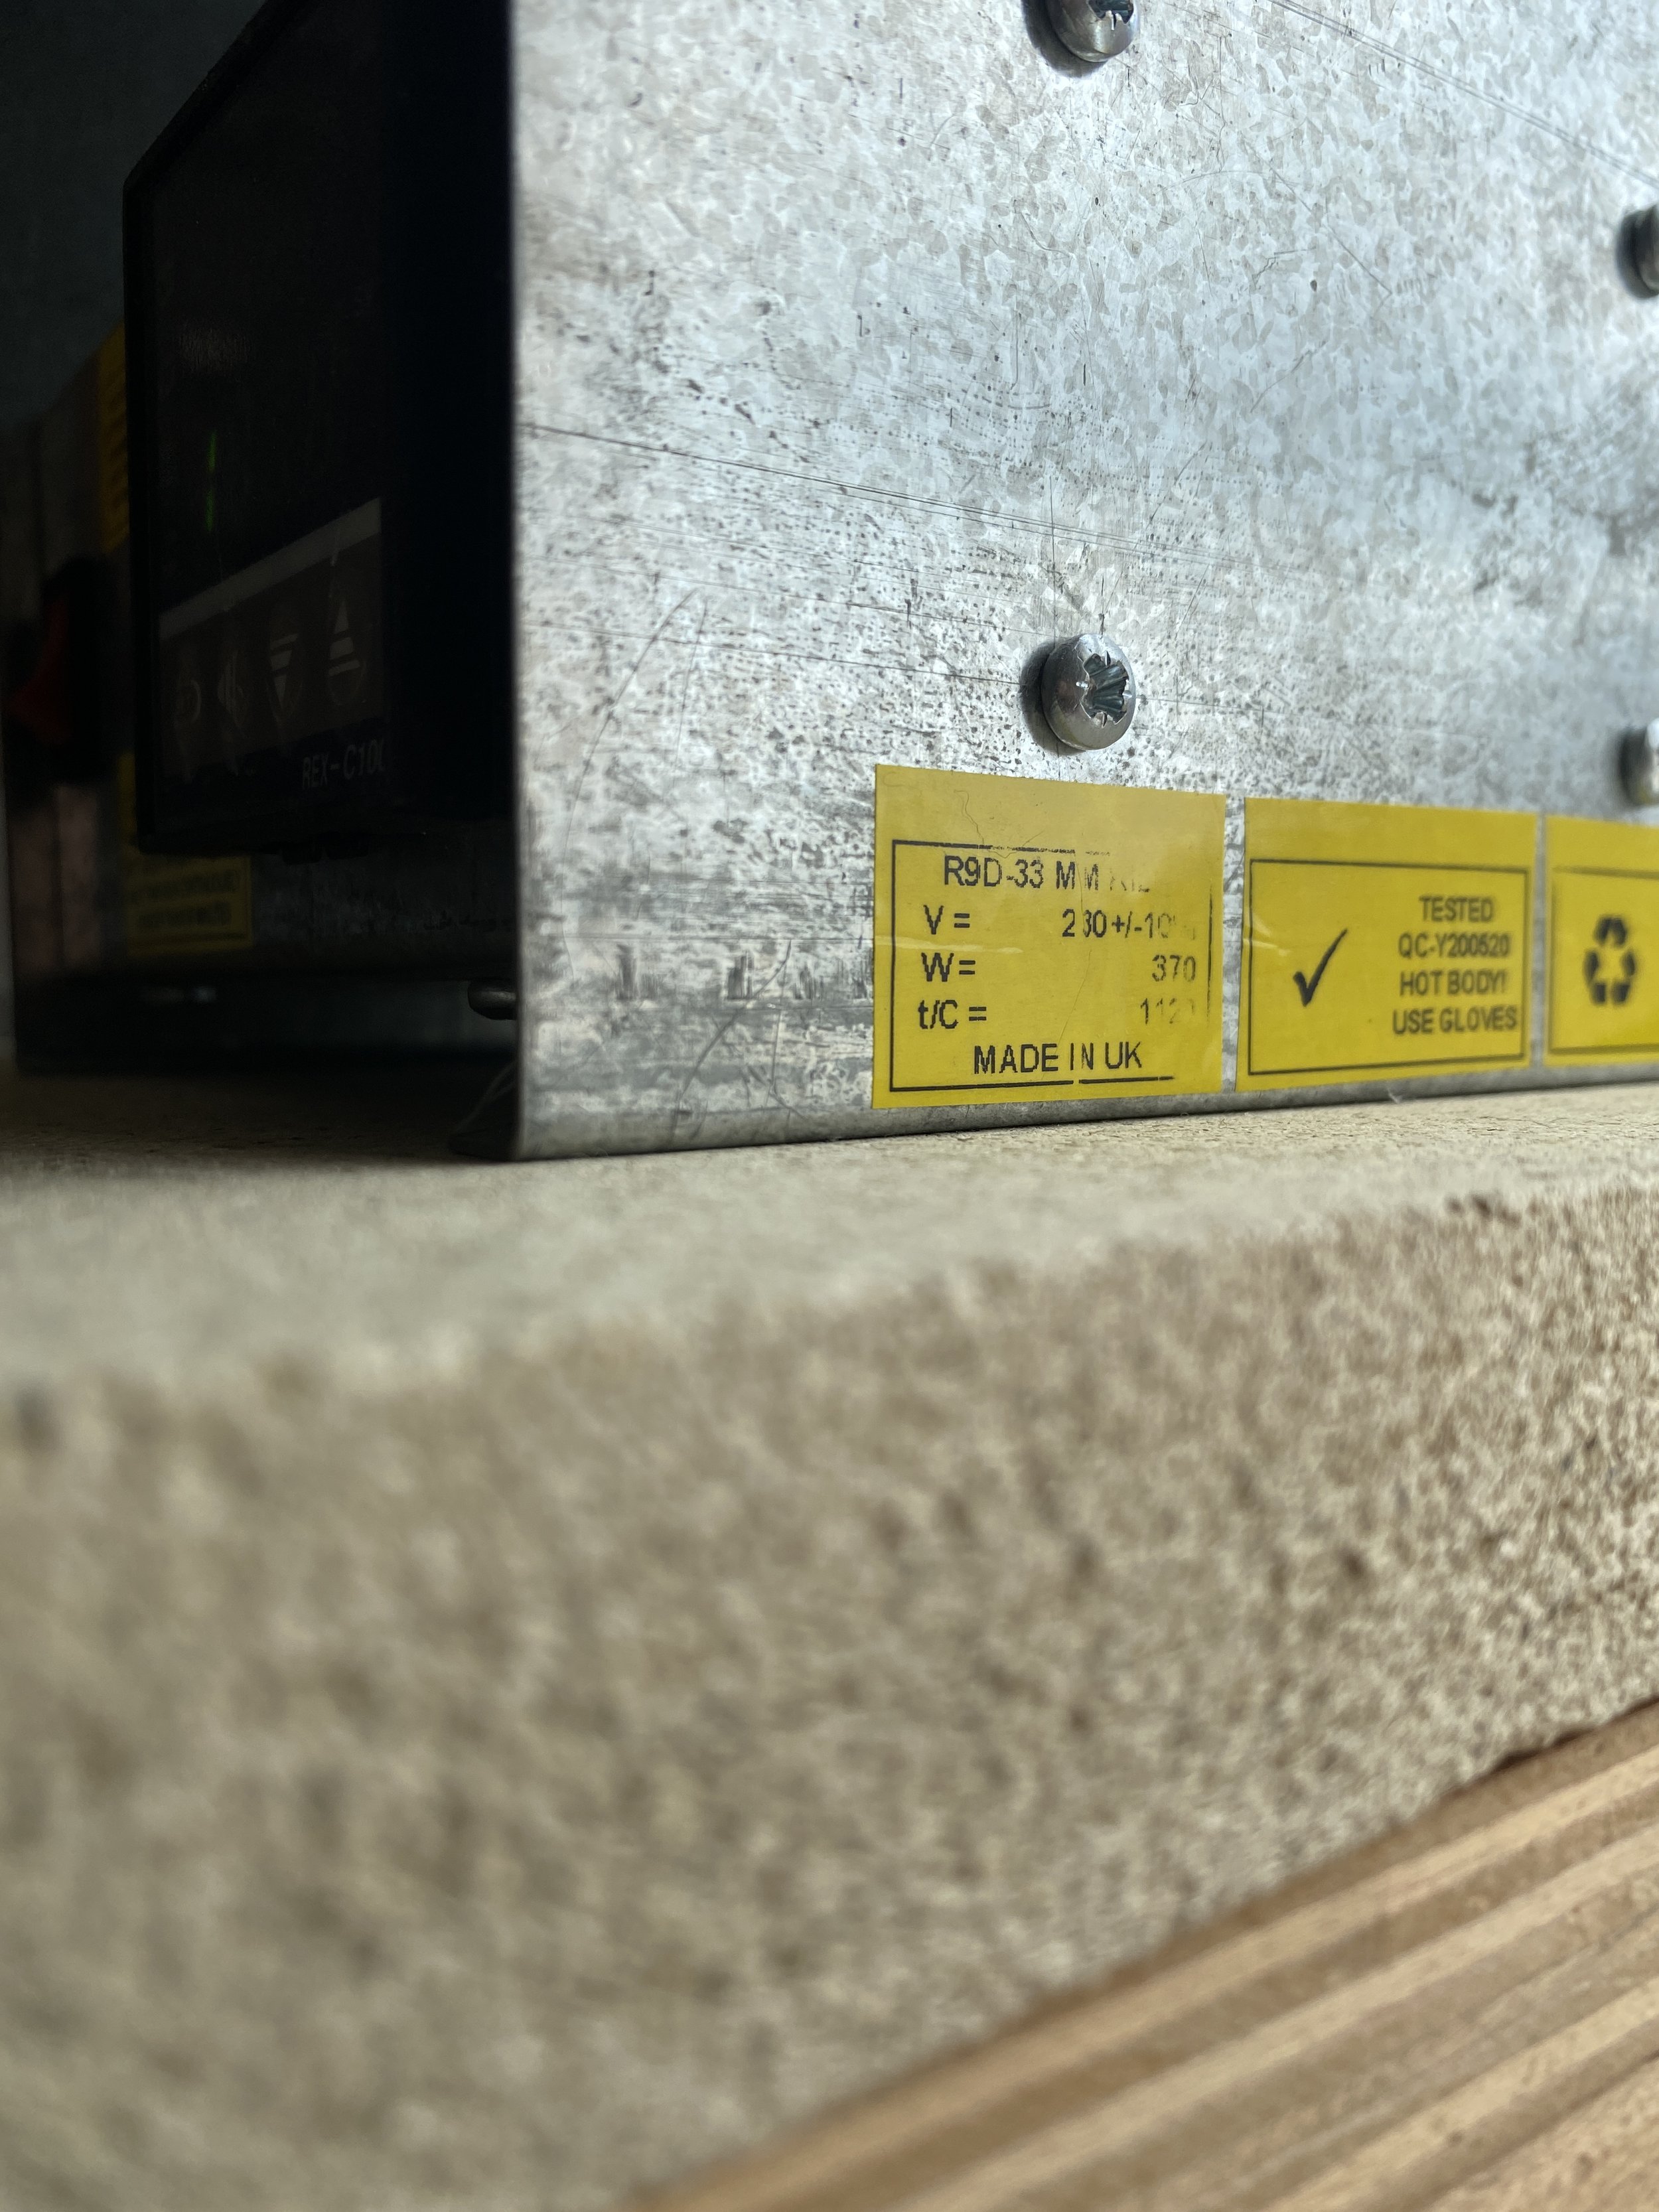
My electric furnace — made in the UK

The aftermath
V. THE CAST
Rather than using gas to melt the metal, I used an electric furness - powered by my workshop’s electricity which uses 100% renewable energy.
I measured out enough silver to ensure there would be enough weight and volume of molten metal to move with greater force into the mould when poured - to completely fill the mould and create a sprue (excess metal from the pour).
I placed the silver into a crucible and set the furnace to rise to the correct melting temperature. The temperature I brought the metal to was actually higher than the metal melting point as the moment the crucible moves away from the furnace it begins to cool. It’s really important to ensure that the metal is still fully molten when it pours into the mould.
After a swift and direct pour (heat gloves on!), once the metal had stopped smoking I opened up the mould to check if it had been a successful cast.
I was over the moon with my first attempt - a good clean cast with minimal draw into the air vents.

The cast pebble with sprue (where the metal poured into the mould)

VI. THE CLEAN UP
Once the silver pebble had fully cooled, I hand pierced (sawed) off the sprue (the excess metal from the pour).
I sanded down any excess from the air vents.
Where the molten metal made contact with the sand, the sand burned and went black. As this cannot be used again, I carefully separated it from the rest of the sand, which can be used again and again.
Once I was happy with the shape of the pebble, I took it through various stages of sanding and I actually gave the pebble a polish so I could check in wiht my client to ensure she was happy to proceed with this first cast.
The surface took on a few little markings from the casting process which we agreed work well with the overall aesthetic of the piece.


VII. CREATE AND ATTACH THE BALE
The next step was to work out the design of bale, to suit the pebble and the wearer.
We decided on a fairly thick wire for the bale in an organic oval shape to suit the form of the pebble, without drawing focus away from it.
Once I had made the bale, I worked out the positioning — with gravity in mind, based on how the shape would hang against the body.


VIII. FINISHING AND POLISHING
After soldering the bale on, the final steps were to sand off any excess solder and polish up the pendant to a high lustre.
I sent the pendant to be hallmarked at my closest Assay Office in Sheffield.
The pendant now bears my makers mark and the the letter X, depicting the year in which it was made — a lovely touch for my client’s mum who celebrated her birthday this year.
Read more about the hallmarking components here.
Finally, I added the pendant to its chain that we chose again to suit the weight and form of the pendant.


I am over the moon with my first sand casting project and can’t wait to develop this practice further.
If you’d like to work together to create something unique using this method, please get in touch.
L x

Behind the altar | Vol. 4 Hallmarking
A closer look at hallmarking and Ara’s considerations to make this a sustainable practice

WHAT IS HALLMARKING?
Hallmarking is the oldest form of consumer protection.
Here in the UK, when selling a piece of jewellery (or, ‘article’), if describing the content of the metal as silver, gold, platinum or palladium, there is a legal requirement to ensure the article has been hallmarked to reflect the description.
UK hallmarking can only be undertaken by one of the UK’s four Assay Offices — London, Birmingham, Edinburgh or Sheffield.
Hallmarking follows an independent assessment of quality and content, the process of which is to 'assay' — meaning to test and assess the precious metal content of an item.

WHY ARen’t all ARA PIECEs HALLMARKED?
The legal requirement to hallmark an article only applies to those over a certain weight, depending on the metal content —
Silver | 7.78 grams
Gold | 1.0 gram
Platinum | 0.5 grams
Palladium | 1.0 gram
Keeping certain pieces within these weights means they are exempt from the legal requirement for hallmarking, which in turn means they have a shorter turnaround time and will not incur the additional costs associated with hallmarking.

A SUSTAINABLE APPROACH TO HALLMARKING
MINIMISING CARBON FOOTPRINT
To minimise carbon footprint, I choose to send my articles to my closest Assay Office — the Sheffield Assay Office.
I have a unique mark registered at the Sheffield Assay Office which can be used to mark only pieces made by me. This mark is always accompanied by the distinctive Yorkshire rose as the Sheffield ‘Town’ mark (see more in ‘The Marks’).
LASER MARKING
The traditional mark is hand struck with a heavy metal punch.
As my pieces vary greatly in size and shape, several different punches would require creating to accommodate the different designs.
Instead, I opted to use a laser engraved mark. This is an electronic process and it means that the shape and size of the hallmark can be easily amended each time to suit the form of the particular article, resulting in less energy than would be required to produce multiple physical punches.

THE MARKS
You will always see at least three marks — the sponsor's (or maker’s) mark, the fineness mark and the assay office mark are all compulsory.
I. THE SPONSOR OR MAKER’S MARK
The first of three compulsory marks —
The sponsor or maker’s mark is unique to the Assay Office or to the individual maker or company; no two marks are the same.
This mark must feature at least two letters within a surround. The symbol I chose was the one I felt most closely resembled an altar or place for an offering.
The black is where metal will be removed, leaving the white raised comparatively.

II. METAL AND FINENESS (PURITY) MARK
The second compulsory mark —
This mark indicates the precious metal content of the article.
The fineness is indicated by a millesimal number (parts per thousand) and the metal type is indicated by the shape of the surround.

III. ASSAY OFFICE MARK
The final compulsory mark —
This mark indicates the particular Assay Office at which the article was tested and marked.
All Ara pieces bear the Yorkshire Rose — the mark of my closest Assay Office in Sheffield.

IV. TRADITIONAL FINENESS SYMBOLS
An optional mark —
Including the lion passant for 925 silver, the Britannia mark for 958 silver, the crown for gold, and the orb for 950 platinum.

V. THE DATE LETTER
Another optional mark —
Until 1999 the date letter was compulsory.
This is no longer the case, but it can be applied voluntarily in addition to the compulsory marks. The date letter changes once a year on January 1st.


AN EXAMPLE
From this example you can see that the article —
i) was made by me
ii) was made from no less than 925 sterling silver
iii) was marked at the Sheffield Assay Office in the year 2020
I hope you enjoyed a closer look at hallmarking.
If there’s ever anything you’d like me to explore as part of ‘Behind the altar’ please let me know.
Lx

Behind the altar | Vol. 3 NATURAL DYEING WITH EUCALYPTUS
How to dye natural fabric with eucalyptus leaves — a step by step guide

Ara’s European hemp pockets — naturally dyed with eucalyptus leaves
VOL. 3 —
NATURAL DYEING WITH EUCALYPTUS
For this month’s volume of Behind the altar, I thought I’d share the process I’ve just been through to dye Ara’s next batch of hemp pockets.
Every piece of Ara adornment is accompanied by a european hemp pocket, designed in house and ethically made here in the UK with minimal waste.
For each new batch of bags, I naturally dye the fabric by hand, using botanical or food waste dye.
David was due to prune a eucalyptus tree so I thought I’d put the leaves to use for my next batch of hand dyeing, rather than letting it go to waste.

Freshly pruned UK grown eucalyptus leaves
PREP THE FABRIC
For natural dyeing, there are several steps to prep the fabric:
Scour the fabric —
I washed it on a cool wash with PH neutral washing powder. This step is to remove any residue on the fabric that could impact the dyeing process
Soy milk binder —
When using plant based fibres, the colour can bind better to the fabric if treated first with soy milk.
Lyra and Atlas have a helpful guide to pre-treating your fabric with soy milk here
This is a fairly slow process so worth doing around a week in advance for the full benefit.
Soak —
Once ready to prepare the dye, I popped the fabric in water to soak which allows any creases to lessen before I placed it into the dye bath.

The pre-treated hemp fabric soaking in water
2. CREATE THE DYE BATH
I separated the eucalyptus leaves from their stems (in hindsight I may have gotten some good colour for the stems so I will try including those next time). I tore up the leaves exposing more of the inside of the leaf, to help extract as much of the colour as possible.
The pot
NB — I use a large aluminium pot for my dye baths. Some dyers advise using a stainless steel pot as this will not result in a reaction from the dye to the aluminium. An aluminium pot could be another factor that would impact on the colour the dye takes.
I filled up my pot of leaves with water and brought it to the boil before quickly reducing the heat to a simmer.
From here I kept returning to the pot every so often to see how the colour was developing. Once it had reached a bold enough colour I took the pan off the heat and removed the leaves with a sieve.
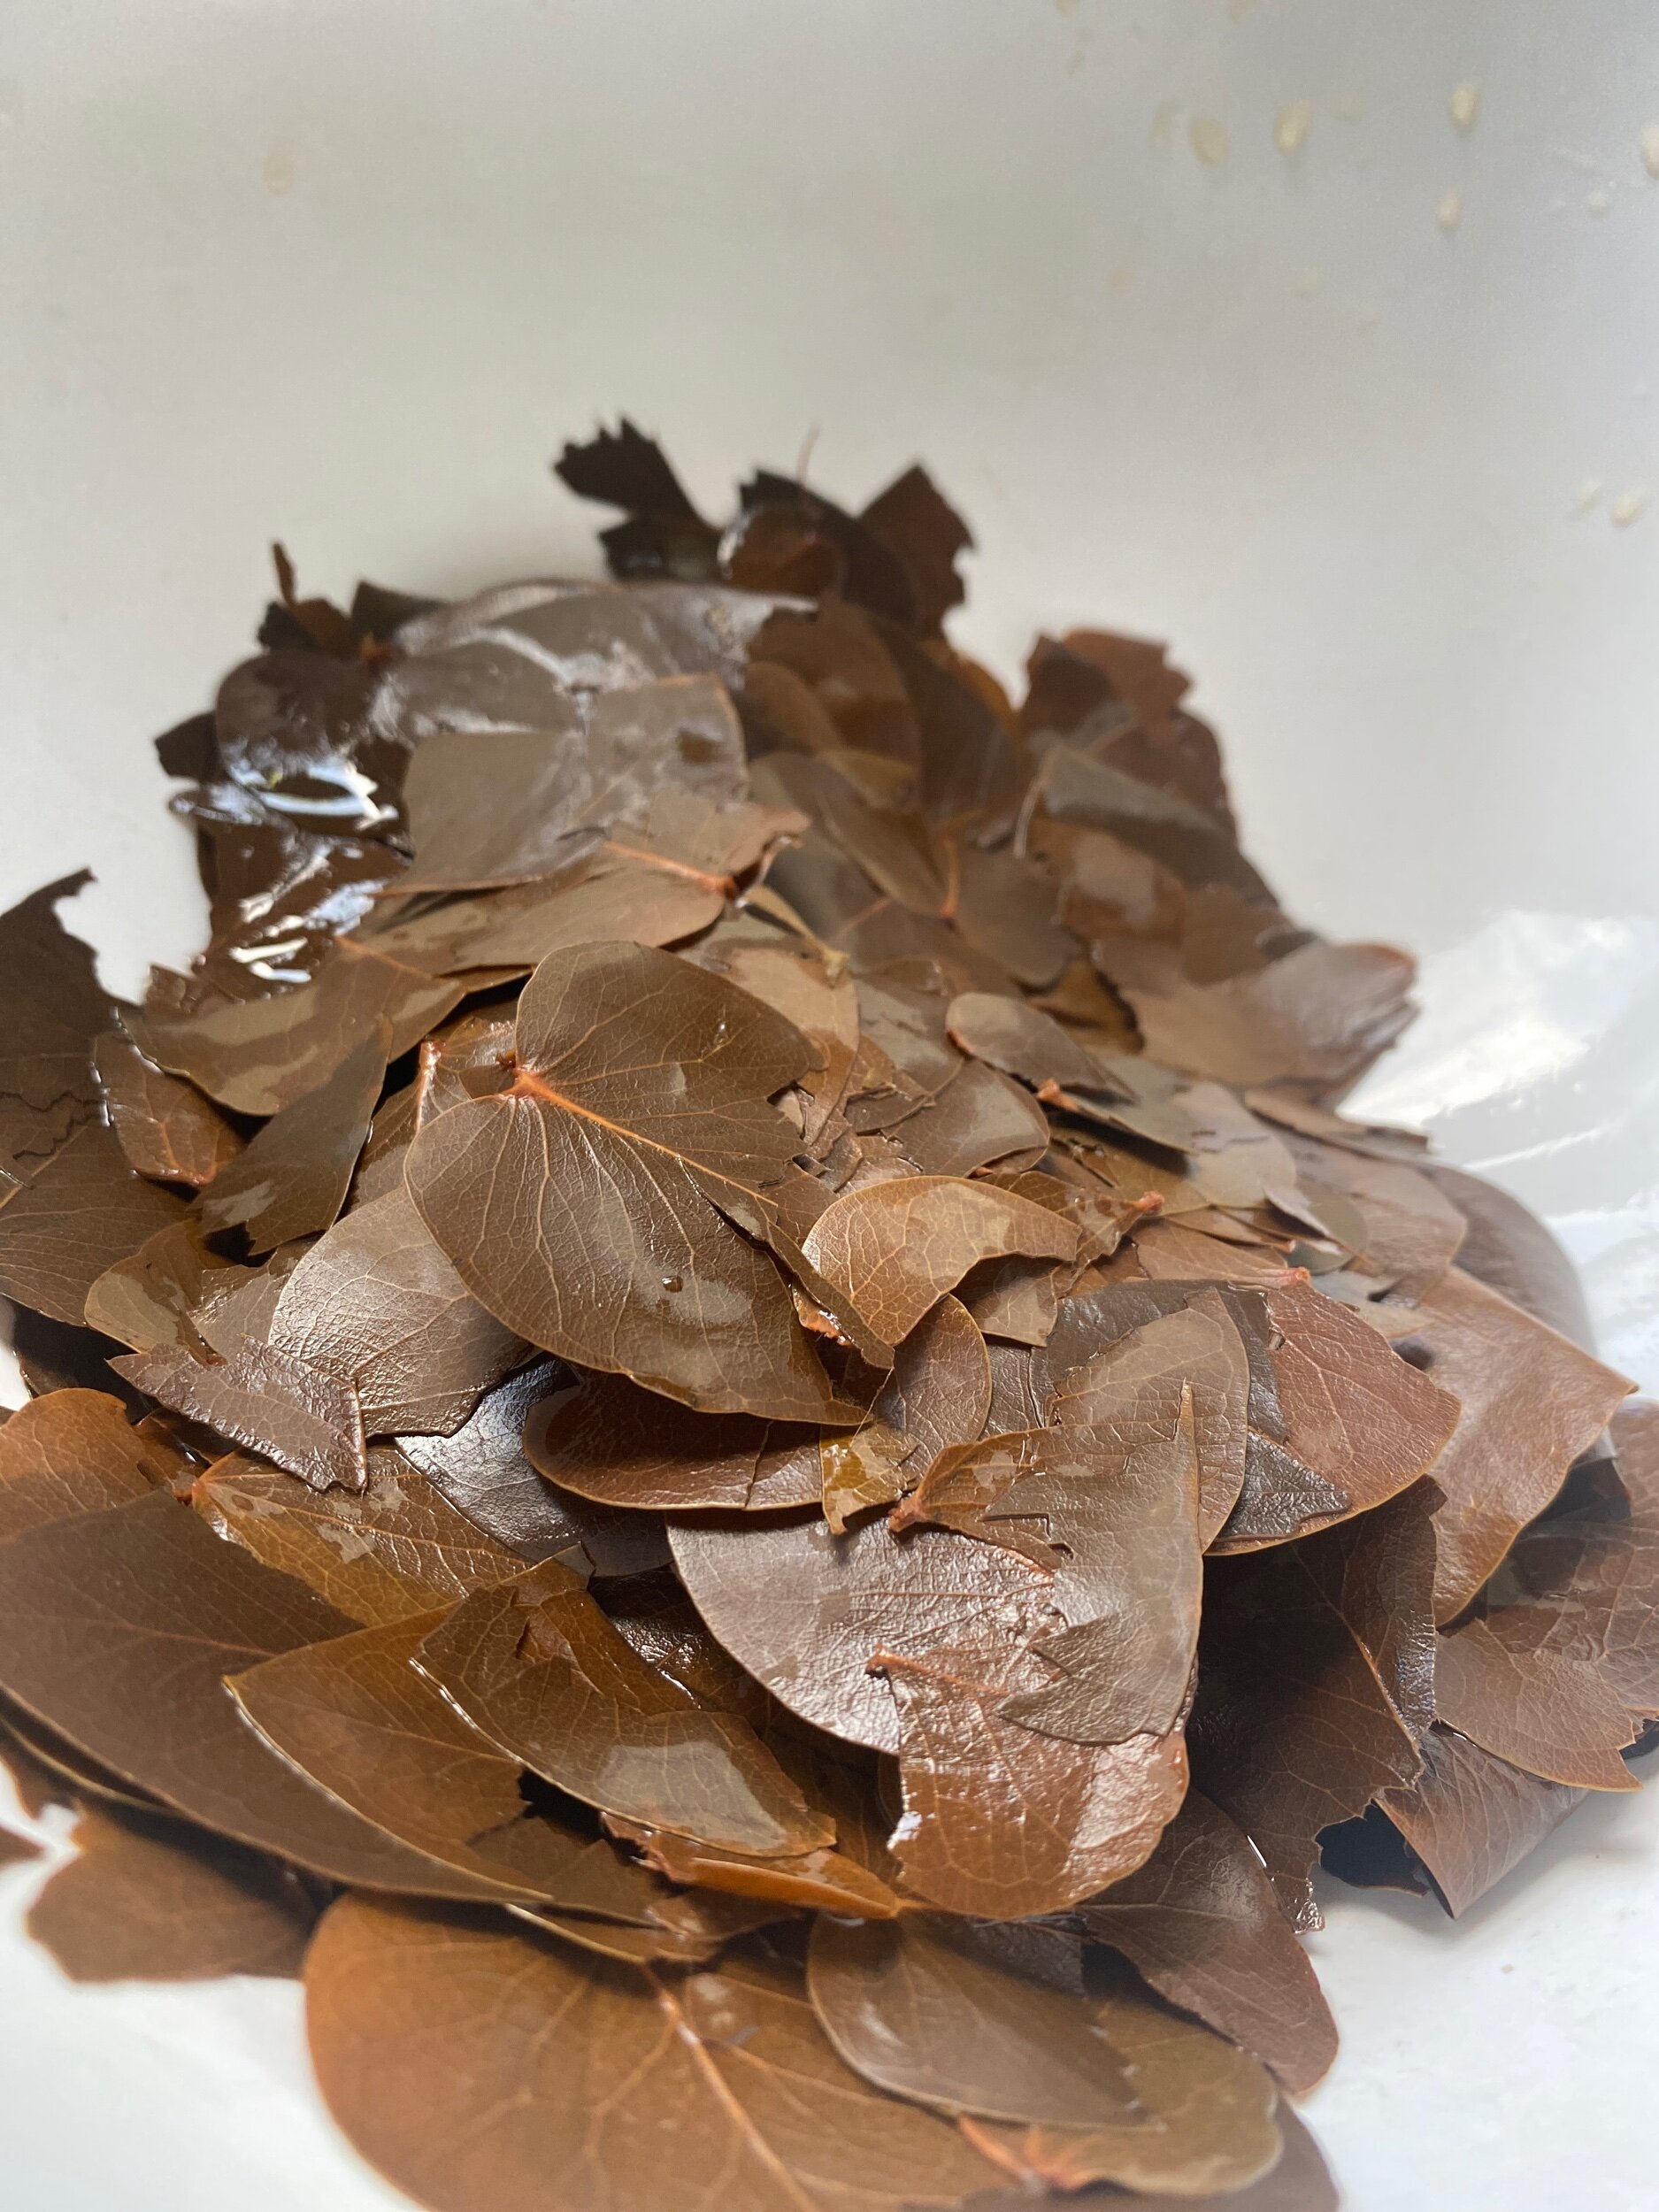
The eucalyptus leaves after the dye has been extracted
3. DYEING THE FABRIC
I added one piece of water soaked fabric to the dye bath at a time to make sure the fabric had room to move around within the pot.
I returned to pot to stir the fabric regularly so the dye wouldn’t sit for too long in any creases.
The fabric is ready to remove as soon as you’re satisfied with the colour but leaving it overnight gives time for a deeper colour to develop on the fabric.

Stirring the hemp fabric in the dye bath
4. POST DYE
Once out of the pot, I washed the fabric with ph neutral washing powder once again.
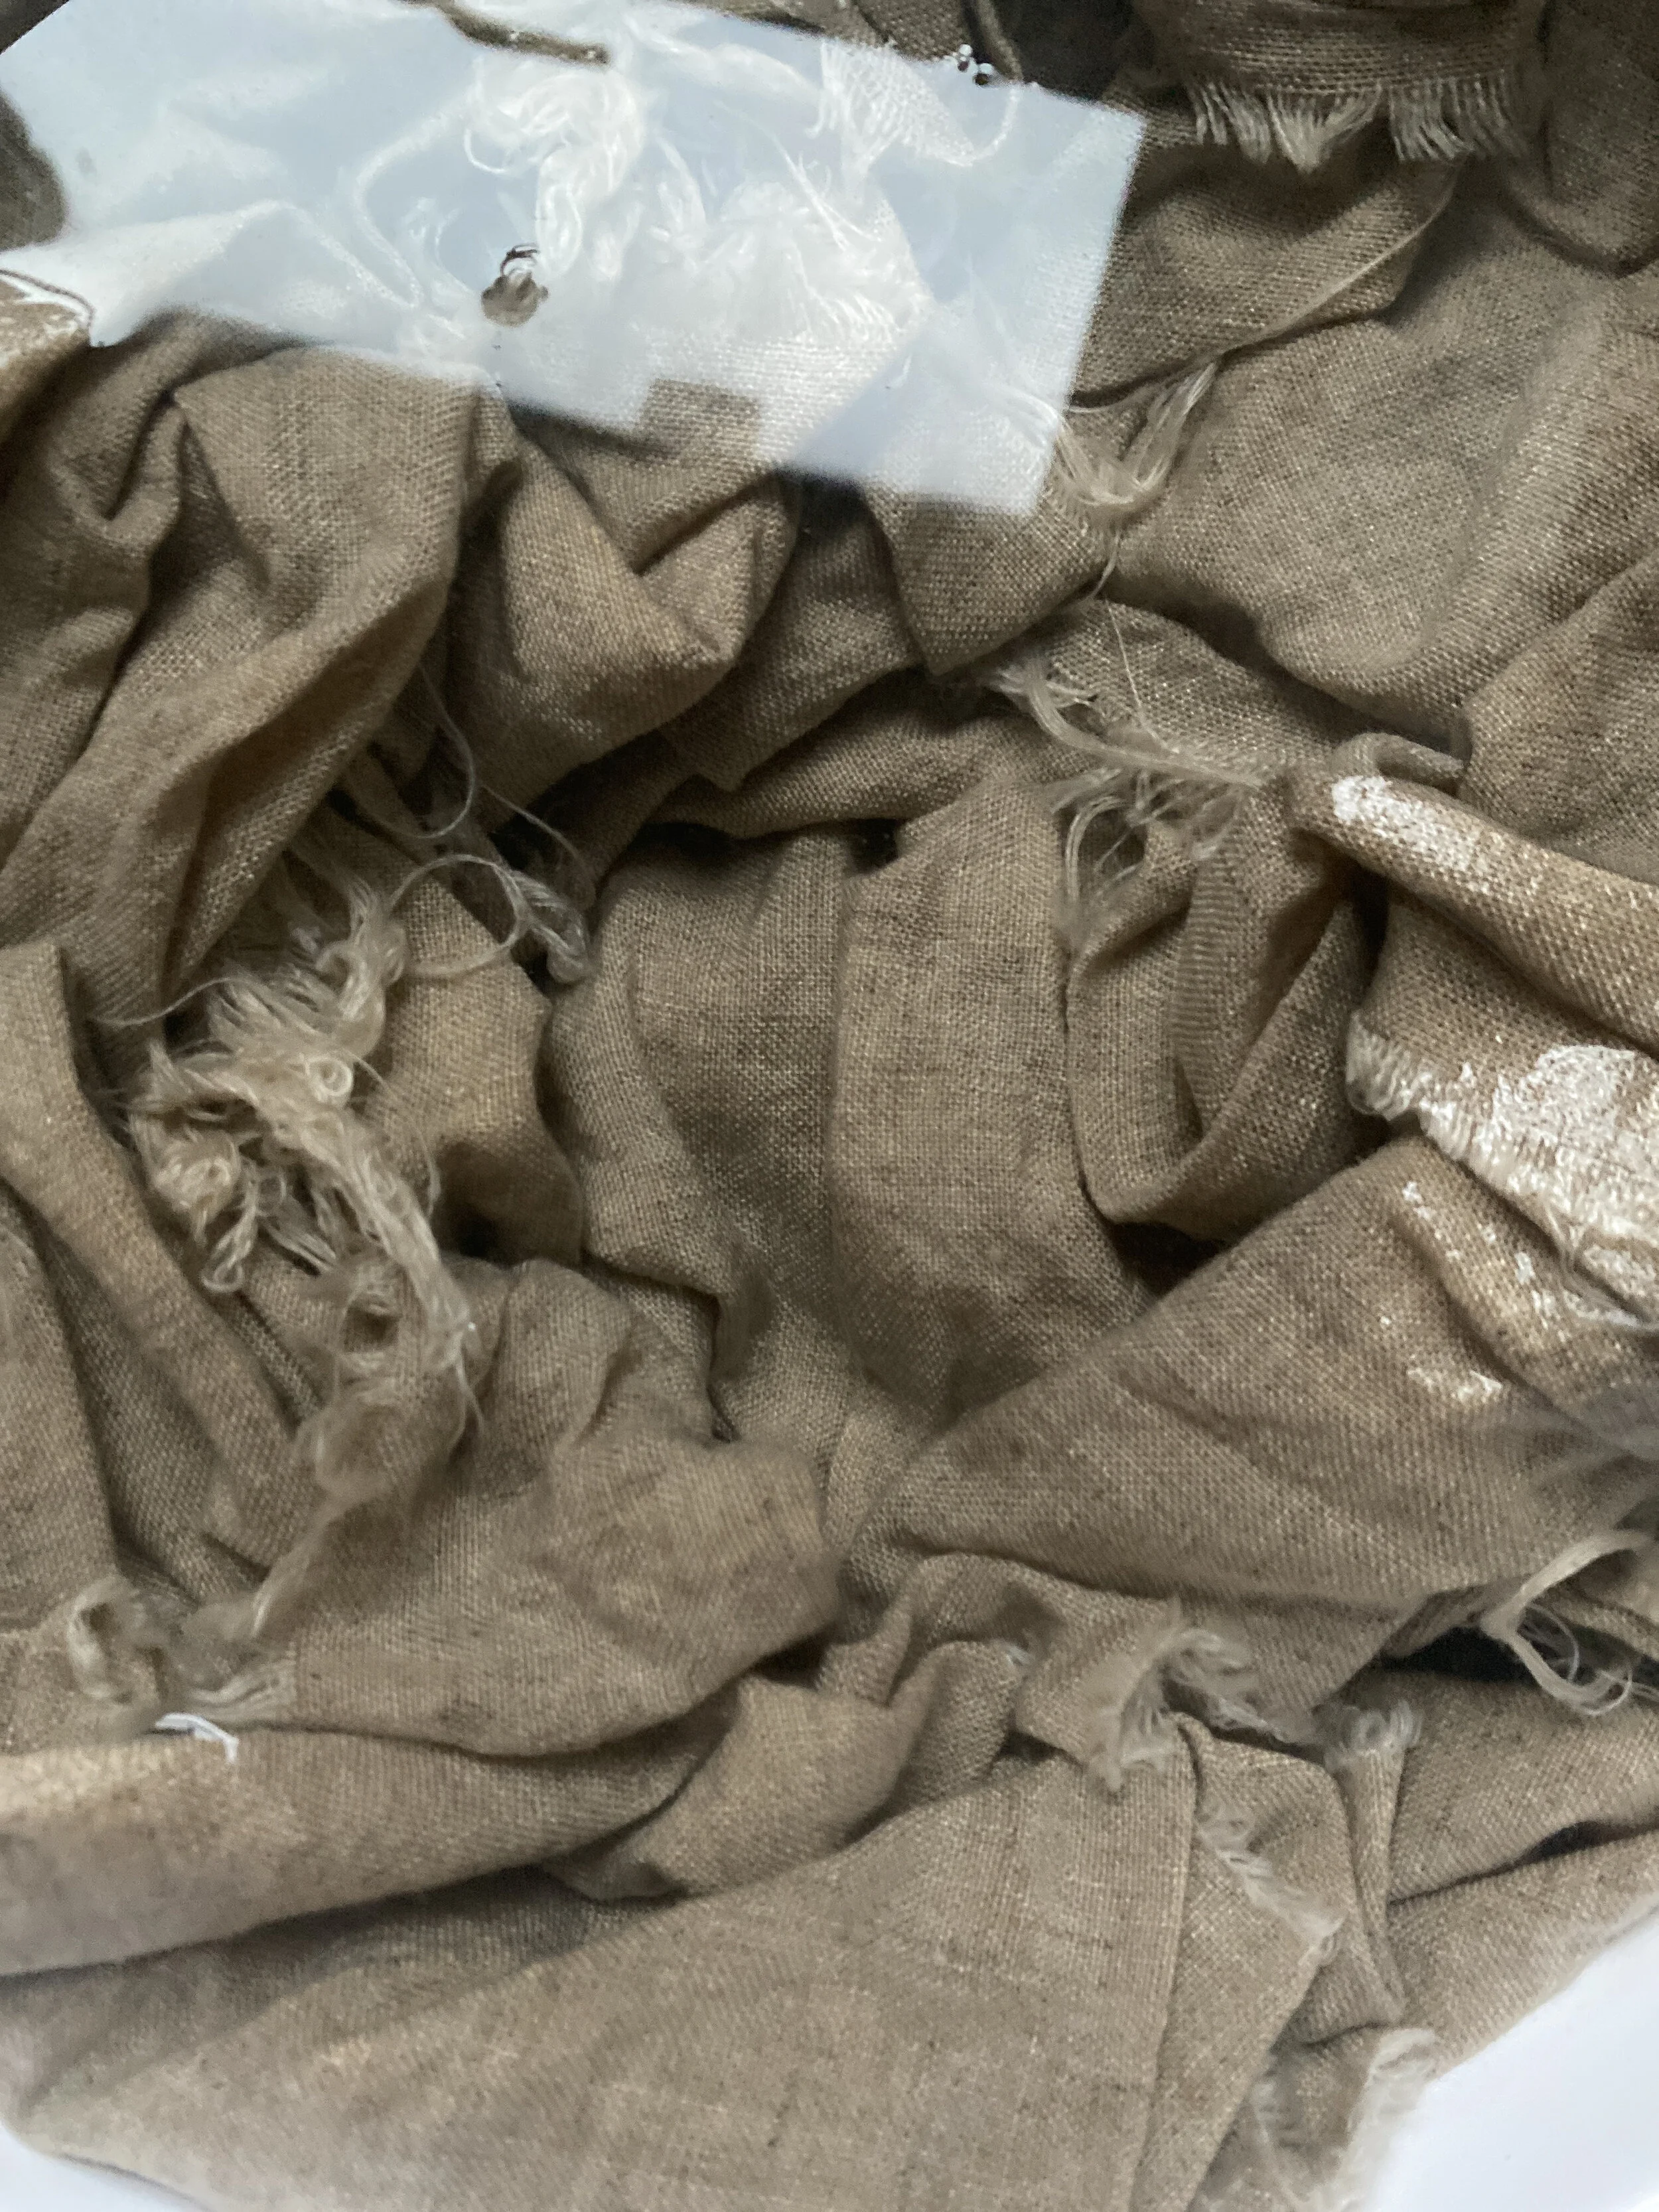
I hung the fabric to air dry. This time I made the mistake of leaving some of my fabric to dry outside on a sunny day. When I brought it in once dry I noticed that one side of the fabric was lighter than the other! So the advice to avoid natural dye from dyeing in sunlight is best taken!
Interestingly I got several different shades of dye from the one dye bath, ranging from a soft sand colour, to earthy terracotta

Different shades of the air dried eucalyptus dyed hemp fabric
THE FINISHED BAGS
I gently steamed each piece of fabric to ease any creases from the wash and to try and get a smoother surface in preparation for sewing.
I sent the fabric to the talented UK based maker who cuts and sews the dyed hemp fabric into Ara’s uniquely designed pockets, to keep Ara adornment safe.
The pockets are carefully sewn with GOTS certified organic cotton thread. The very little waste that is produced from the edges of the fabric is returned to me to be repurposed.

A finished hemp pocket
I hope you enjoyed this insight into the process of natural dyeing with eucalyptus leaves.
I have a list of topics growing for subjects to explore as part of Behind the altar — if there’s anything you’re curious for me to explore, just let me know.
L x

Behind the altar | Vol. 2 Making the Braided Grass Ring
Volume 2 of Behind the altar explores the creation of Ritual Object III - The Braided Grass Ring

VOL. 2 —
MAKING THE BRAIDED GRASS RING
Before launching Behind the altar I did an open call to invite suggestions of topics for me to explore as part of this project.
Something that many of you were interested to know more about was the journey a piece of Ara adornment takes from start to finish.
For volume 2, I thought I’d walk you through the creation of the Braided Grass Ring.

Ritual Object III — The Braided Grass Ring in recycled solid gold

Accompanying props from my recycled gold Phase Fine shoot
THE CONCEPT
—
The idea for the Objects of Ritual family was inspired by a handful of props I used to accompany my recycled gold Phase Fine shoot.
I decided to create a mini collection capturing three objects as wearable sculptures — a collection of protective amulets; miniature sculptures to adorn the body.
One of which was the braided grass ring.

Foraged braided grass, stretched out on my weaving loom and painted with candle wax
CREATING THE ORIGINAL BRAID
—
As this was a sculptural series, working with wax to sculpt and create the objects —to later be cast in recycled solid gold and silver— was the natural fit.
I toyed with the idea of carving the braided grass ring in wax too but I wanted the grass to look as authentic as possible, with the natural imperfections of actual grass.
Instead, I foraged some long grass growing locally and knotted it at one end before braiding the length fairly tightly to get an even braid.
The resulting braid was delicate and hollow with some small gaps — features which would not lend themselves well to the mould making process in which an object is surrounded with melted rubber. The braid would not have withstood the weight of the rubber, and the rubber would also have seeped into the gaps.
In attempt to make the braid more suitable for mould making, I let the braid air dry over several weeks before stretching the length out on my weaving loom and securing it with paper tape.
I gently painted the surface of the braid with melted candle wax, sealing any gaps and making a stronger form to withstand the mould making process. I kept the wax as thin as possible, to retain some of the natural surface texture of the grass.

1/3 of the original braid, ready for moulding
CREATING THE WAX
—
As moulds have a size limit, I carefully cut the braid into three. Each unique in its own form, and long enough to make a ring band. I handed them over to my casting house to have a mould made of each - at that point we were unsure how each of them would translate once cast.
With a successful mould of each, the next step was to inject the mould with wax.

Waxes from the mould
For this step, I measured out and formed the wax into a band shape, to size, and melted each end of the braid together using the flame of my oil burner.
Working away any excess way and smoothing the join so it blends in as much as possible.

A wax braid moulded into a band
LOST WAX CASTING
—
Once happy with the wax, I sent it to my casting house who attach many waxes to a ‘tree’, to cast a full batch in recycled solid 925 sterling silver or recycled 9ct gold.
Over time, once I have made a ring in a particular size, I have a new mould made of the silver ring (which is ideal for mould making), so that future orders in that size can be cast directly by my casting house, without having to send the wax to me to shape into a band. This streamlines the process and helps to minimise carbon footprint.

A freshly cast recycled silver ring with the sprue still on the inside
REFINING AND RESIZING
—
The silver or gold cast band is returned to me with a sprue still attached (where the metal flowed down the tree into the wax ring).
I saw off the sprue, file down any excess metal and then go through a phase of sanding to prepare it for polishing.
I also reshape and resize the ring at this point as the metal shrinks a couple of percent during the casting process.

The band pre re-sizing

In the polishing tumbler, pre-polish
POLISHING
—
Only once the ring has been through every stage of sanding and buffing, I pop it into my polishing tumbler —more fondly known as ‘Celeste’ — with a little castile soap to lubricate the stainless steel shot. I leave the machine on for several hours with a batch of jewellery in it, using electricity powered by 100% renewable energy.
The polishing tumbler works great for pieces like the braided grass ring with texture, but for pieces with a curved or flat surface area that need a mirror polish, I take them though a hand polishing process instead.


The Braided Grass Ring in recycled solid silver
Once out of the polishing tumbler I give the ring a gentle wash with warm water and polish with a soft cloth before tucking her into her hemp pocket to make her journey safely to her forever home.

Packed with a European hemp pocket, naturally dyed by hand
I hope you enjoyed joining the braided grass ring’s journey.
If there’s anything you’d like me to explore as part of Behind the altar, let me know in the comments.
L x

Behind the altar | Vol. 1 Branding
For the first volume of my new project ‘Behind the altar’ I walk through the journey I’ve taken with my branding so far
WELCOME
to
BEHIND THE ALTAR

On the bench — wax work
Welcome to the first volume of my new project, Behind the Altar —
A place to take you behind the altar to explore what really goes on behind the scenes — on the bench, on set, and anything else you’re curious to know.
Expect unpolished content, grubby fingers and a proper peek at what goes into making Ara a responsible brand.

VOL. 1 — BRANDING
For Volume 1, I thought it fitting to return to the beginning of my journey and explore the branding that captures the foundation of Ara in graphic form.
One of the things I love most about managing my own small business is all of the creative aspects I get to play with, a favourite being graphic design.
I am no expert when it comes to graphic design with no training or experience but feeling so close to the brand and it’s portrayal —and launching my brand without any financial support— it was something I was really keen to have a stab at myself.
I thought I’d walk you through the journey I’ve taken with Ara’s branding so far — from where it began to where it is now. You will likely recognise this pool of graphics from across my website, packaging, accompanying cards and stamps, and across platforms — in the content I share on Instagram and in Letters of Ara.

Adding graphic elements to my sample sale imagery
THE SOFTWARE
—
I use Adobe Illustrator for all of my graphic design. Anything from branding to Instagram posts and the monthly graphic illustrations I used to create for Letters of Ara see them here.
This programme gives me scope to create something completely unique to Ara. I pay a monthly subscription which gives me access to other programmes like Photoshop and Lightroom which also enable me to edit all of Ara’s images myself.
Something I’ve found tricky with graphic design is the limitless possibilities it permits. I’m admittedly not the most decisive person and with so many potential design directions to explore, I find it really tempting to explore different avenues and hard to commit to one in particular.
So my main approach is to play. I try and work fairly intuitively and that way I can learn the skills needed for a particular task as I go, rather than feeling overwhelmed to learn everything.
The original logo
WHERE IT BEGAN
—
THE LOGO
In 2017 I sat down with a blank illustrator document and literally wrote the words Ara the altar in about 40 different (but very similar) fonts. I wanted to find just the right fit at this stage to create a logo I could commit to and something I knew I’d love for years to come.
From the offset I had some little hand sketched symbols in mind but when attempting to incorporate them into my logo it just felt too busy. No matter what I tried, I kept coming back to a simple line to separate Ara and the altar. Ara translates from Latin as the altar so this added some distinction as well as visually translating the brand name. I decided to use the sketched element for the line to add a hand drawn aspect to the design.
As various apps and platforms require branding to fit within particular shapes and dimensions, I also needed to create a logo that would fit into a square or a circle. For this, playing around with the original logo layout led me to stack the words in a way that created more of an ‘altar’ structure.
The original square logo

Current branding — a graphic depiction of the brand
WHERE WE ARE NOW
—
In 2018 I introduced something more visual to depict a physical altar and the notion of an ‘offering’ upon it.
The way I approached the design was to think around the the notion of Ara as an altar upon which to offer objects, with a nod to Ara’s core influence — the ancient world’s relationship with astronomy and nature.
This developed into the idea of creating a logo with an altar that could be used alone as a simple graphic but one that could also be added to with interchangeable symbols representing different areas of influence upon the altar.
This finally gave me an excuse to incorporate some of the little symbols I’d developed the first time around — and to play with colour.

Early work in progress developing the altar logo
THE ALTAR
—
I wanted to create an altar that could stand alone as a graphic without the addition of the symbols. Something simple that captured Ara and would be instantly recognisable.
When it comes to the ancient world I’m most closely drawn to Ancient Rome. After researching ancient altars and looking back through images I took when in Rome many moons ago, I worked on and kept tweaking a simple line drawing for the altar, adding the word ‘Ara’ as if it had been carved in stone.
At this point I also played with a dome shaped altar but although I liked it aesthetically it arguably looks more like a gravestone so I stuck with a more literal interpretation of an Ancient Roman altar.
You can see here I also had a brief play with a truncated version of my logo in letter form — the acronym ATA. I had completely forgotten about this and actually really like the shape and symmetry so may return to this at some point. Let me know what you think of ATA.

Early work in progress developing the symbols
THE SYMBOLS
—
When first exploring symbols I had various different elements that I wanted to capture.
Initially for this, the idea was to create a pool of symbols which I could alternate upon the altar.
The more I played with the symbols the more I became drawn to a simpler approach - capturing only two symbols to depict astronomy and nature as the two key influences.
I developed the ‘flora’ symbol to represent nature; a symbol often used in Ancient Rome. To capture astronomy, I combined Luna and Sol to sit above and shine down on the flora offering.

COLOUR
—
As black felt too flat, I use a deep but soft brown (like the earth) as the main colour for my logo.
With the introduction of the graphic depictions, I’ve found these colours have shifted over time, sometimes seasonally and otherwise depending on how I’m using the branding.
I currently have a pool of colours that I pull from but expect this will continue to evolve. Traditionally a brand will have a core set of colours which whilst I do have, I also like the flexibility of allowing these colours to ebb and flow.


I hope you enjoyed this little insight into the thought process behind Ara’s branding. I have a list of topics growing for subjects to explore as part of Behind the altar — if there’s anything you’re curious to know, just let me know.
L x

NATURAL DYEING WITH PINE NEEDLES
I share the process I used to naturally dye European hemp fabric with pine needles, for Ara’s accompanying bags

European hemp fabric hand dyed with pine needles
NATURAL DYE | A PROJECT
—
Last year I began a long overdue project to naturally dye the fabric used to make the bags which accompany Ara adornment.
I began my dyeing journey with avocado stones and skins - producing a dusty rose (if you’re new to avocado dyeing I wholeheartedly recommend Kathryn Davey’s ebook) and then onion skins - producing a rich ochre and a soft apricot - pictured below.

Ara adornment accompanying bags, naturally hand dyed with onion skins
PINE NEEDLES
—
It seemed fitting to begin this year by putting to use something I had in abundance - pine needles.
I couldn’t find much advice online about creating a dye bath with pine needles but I knew it could be done so went into it with an open mind and relatively low expectations.
I ended up so besotted with the soft mauve-clay colour produced by the pine needles that I dyed four pieces of my European hemp fabric with the same dye bath.
I am no expert in natural dyeing but if you’re interested in the ins and outs, I’ve shared my process below —

I | PREPARE THE FABRIC
The natural fibres of the hemp fabric I chose to work with needed to be scoured before dyeing to ensure the fabric would take the colour evenly. For this, I popped all of the fabric on a 40 degree wash with my usual fragrance free washing powder and a cup full of bicarbonate of soda - no fabric softener.
The second part of prepping the fabric was to soak it in water before it went into the dye bath. From previous dye projects I’ve gotten in the habit of soaking my fabric for about an hour before it was time to add it to the dye bath. This prevents the dye sitting in any creases once the fabric is added to the pot.
II | PREPARE THE DYE BATH
The general rule is to use 1 part dye to 2 parts water. If I’m honest I haven’t stuck to this religiously, I’ve enjoyed the freeing approach of working with what I have and I’ve still been completely mesmerised by the results.
This time, I collected a box full of pine needles (approx 30cm x 20cm) which went into a 20 litre aluminium pot. I usually dye one piece of fabric (1m x 1.5m) at a time - when it comes to the size of the pot and the amount of liquid you use, the main thing is that there’s enough liquid to cover the fabric, with a little room for it to move freely.
I filled the pot with cool water and added the pine needles, popped the lid on and brought the pot to a simmer, but not a boil. From this point I turned the heat down a little and left it on the heat for as long as felt right. I just played this bit by ear. Once I was happy with the direction it was going in I turned the heat off, leaving the pan on the hob.

III | STRAIN THE DYE BATH
Once I was happy that the water had taken the right intensity of colour, the next step was to remove the pine needles. I didn’t sieve the pine needles as I didn’t have a spare pot big enough to pour the liquid into. So I just fished them out with a fine mesh sieve.
Generally, if you want to achieve a really even colour the advice is to strain the fabric through muslin or a sieve. Any little bits left could result in deeper patches of dye on your fabric.

IV | ADD THE MATERIAL
After adding the material to the pot, I spent a bit of time gently working out any air bubbles in the fabric with a wooden spoon, making sure all of the fabric was submerged.
I brought the pot to a gentle heat again for an hour or so and to avoid the dye sitting in the creases, I’d return to the pot every so often to stir and unsettle the fabric.
And then it was just a game of patience. The longer you leave it, the stronger the colour will be (where there is still colour to give). It’s also worth bearing in mind that when the fabric is wet it’ll looks darker than it will once dry.

V | WASH THE FABRIC
When I was happy with the colour of the fabric I wrung out the fabric and popped it back in the washing machine with my fragrance free washing powder again and no fabric softener, to wash and rinse out the dye. This is always the scary part incase the dye all runs out but I was even happier with the final result than I imagined I would be.
Finally I hung it up to dry; the advice for naturally dyed fabrics is to avoid direct sunlight to prevent the colour from fading.
VI | REUSE OR REPURPOSE THE DYE BATH
One thing I noticed with the pine needle dye bath is that the intensity of the colour actually got stronger over time. I was so pleased with the results that I used the dye bath over and over again.
Once I was finished with the dye, I added it to our compost, to be returned to the earth.
~
If you decide to give this a try too let me know how you get on - I’d love to see your results.
The fabric I dyed will give me enough for a few batches of accompanying bags, as well as something else I have planned for this dusky coloured hemp.
I can’t wait to introduce you when the time comes.
L x

Welcoming in the objects of ritual

THE OBJECTS of RITUAL
~
Three protective amulets; miniature sculptures to adorn the body.

The concept for this mini sculptural collection draws inspiration from the objects used in my recycled gold Phase Fine shoot.
The original objects were hand sculpted and then cast in recycled solid 925 sterling silver. As always, accompanying chains are also made from recycled silver, here in the UK.
Allow me to introduce you.
L x

O B J E C T I
The Pear
~
A sweet fruit for sustenance and pleasure.
A pendant to adorn the neck.
Hand sculpted in wax and cast in recycled solid 925 sterling silver.


O B J E C T II
The Vessel
~
To hydrate & unwind.
A pendant to adorn the neck.
Hand sculpted in wax and cast in recycled solid 925 sterling silver.

O B J E C T III
Braided Grass
~
To protect.
A ring to adorn the finger.
Created by braiding locally foraged grass and cast in recycled solid 925 sterling silver.

Every object comes with a little accompanying card, printed locally with vegetable ink on recycled stock.


Letters of Ara | 12 months of graphics
A collection of 12 monthly graphics capturing seasonal points in astronomy and nature
Upon launching Letters of Ara in January 2019, the intention was to share a monthly email exploring areas of influence and interest for Ara.
Throughout the year I designed a new graphic to represent each month, focusing on the astronomical or natural world.
Rather than leave them sitting in inboxes, I thought I’d pull them together into one place to capture the unfolding of the year.
L x

On the 12th January 2019, the night sky treated us to the close approach of Mars and the moon.

February brought the second super moon as it reached its closest approach to the earth, or perigee, looking a little larger and brighter than usual.

March traditionally welcomes the first true signs of Spring here in the UK with daffodils, snowdrops, aconites, crocuses and blossom.

In April, the annual Lyrids Meteor Shower, peaking on the evening of the 22nd through to the morning of the 23rd. The shower's radiant point is near the constellation Lyra (depicted to the left of the graphic), but the meteors can appear anywhere in the night sky.

In May, the night sky brought us a 'seasonal blue moon'. It doesn’t appear blue, it is so called as the third of four full moons to fall within one astronomical season (after the March Equinox and before the June Solstice). Usually only three full moons occur during a season, making a seasonal blue moon (occurring every few years) a rarity.

June saw Jupiter at its closest approach to the Earth, with its four largest moons on either side of 'the giant planet'.

in July, as the Full Moon fell almost in alignment with the Earth and the Sun, part of the Moon darkened as it gradually moved through the Earth's shadow, creating a Partial Lunar Eclipse.

In August the night sky brought us the annual Perseid meteor shower.

In the astronomical world, the 23rd of the month saw the Autumnal Equinox, one of two times throughout the year when the sun illuminates the northern & southern hemispheres equally. Here in the northern hemisphere, the second equinox of the year marked the end of Summer and the beginning of Autumn.

Candle season! October is one of my favourite months: heather on the hills, wet leaves on the ground, an abundance of seasonal colourful veg, toasted pumpkin seeds and a hint of spookiness in the air.

The season of Ara’s favourite, the humble pear.

A shift in season and time to slow down and find pleasure in a winter walk, a cosy jumper and a mug of something warming to bring joy and a little calm throughout all of the hustle and bustle.

It's mental health awareness week
Mental Health Foundation’s 10 ideas for looking after our own mental health
Today marks the beginning of Mental Health Awareness Week.
This year, with a focus on the power and potential of kindness, defined by doing something towards yourself and others, motivated by genuine desire to make a positive difference.
Mental Health Foundation have identified 10 simple ideas for looking after your own mental health.
I thought this was a really important resource to share, for reference at any time, not just this week.
If this is somehting you’d like to explore further, you can find many resources on the Mental Health Foundation website
With love,
𝐿 𝑥

